The NetScaler DataStream is a new feature introduced in version 9.3 and it provides an intelligent mechanism for request switching at the DB layer, it distributes DB requests based on the SQL query being sent. The main benefits of this technology are:
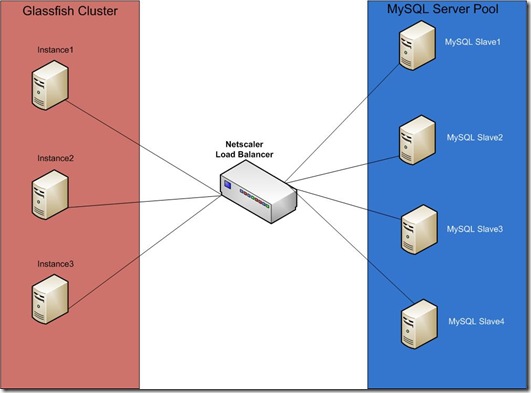
In this post I am going to show a simple read-only database scale out using NetScaler DataStream. I have a couple of replicated MySQL slaves and I want to load balance the select queries amongst these MySQL slaves. I will configure a JDBC connection pool in my Glassfish Cluster and that pool will connect to the NetScaler LoadBalancer instead of directly connecting to a database server. The setup is shown in the below image:
First I will configure all the MySQL slaves in Netscaler.
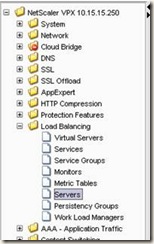
Add the all the MySQL slave servers. Go to Load Balancing –> Servers

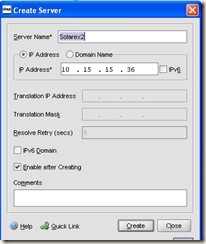
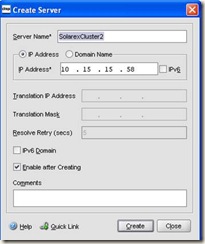
Enter the name for the server and IP address for that server.

After adding all the MySQL servers, I am going to add the MySQL services running in these servers. Go to Load Balancing –> Services

Enter the name for the service, select the MySQL server we added in the previously, select Protocol MySQL and the port on which MySQL is running in this server, in my case it is the default MySQL port 3306.
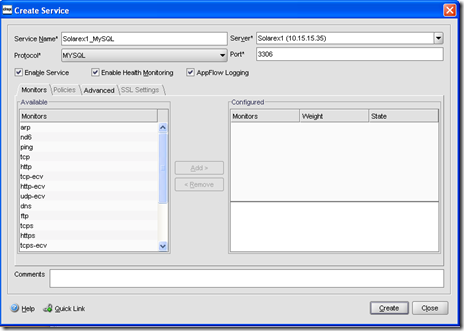
Same way create services for all the MySQL servers that we want to run.
Now I will create the virtual server for these MySQL services. Go to Load Balancing –> Virtual Servers
Enter the name for this virtual server. Enter the IP Address, select the protocol MySQL and enter the port, here I have entered the default port for MySQL. Select the MySQL slave services that we want to add to this virtual server. Select the Load Balancing method as per your requirement, in the Method and Persistence tab.
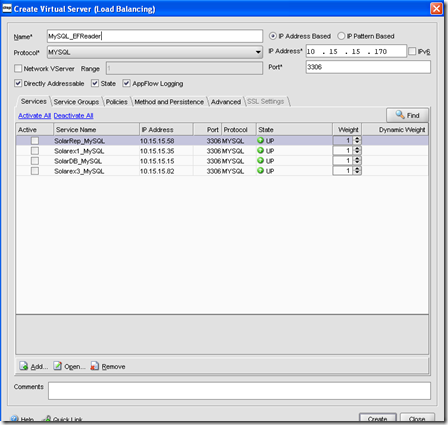
So we are ready with our MySQL virtual server. Right now we can start using it, but thing is that at this point all my MySQL services are using default TCP monitors. The good thing with Netscaler is that we can create monitors for monitoring MySQL services. For DataStream, Netscaler has monitor type MYSQL-ECV. Using this type of monitor we can send SQL request and parse the response of the request and then decide the state of the service. I will create a simple MYSQL-ECV type monitor which will check the replication status in a MySQL slave server. If there is any error with the slave, it will mark the service as DOWN.
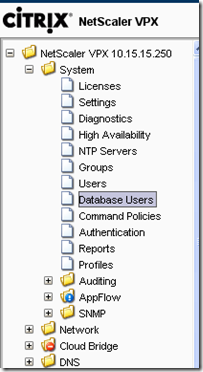
First I have to add a database user. Using this database user’s username and password my MySQL-ECV monitor will connect to the database server. Go to System –> Database Users
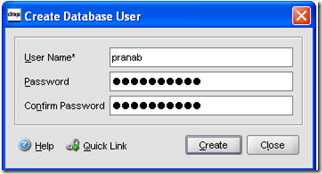
Enter the database username and password.
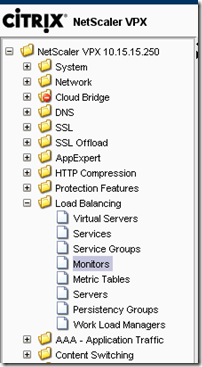
Then I will create the MySQL-ECV monitor. Go to Load Balancing –> Monitors
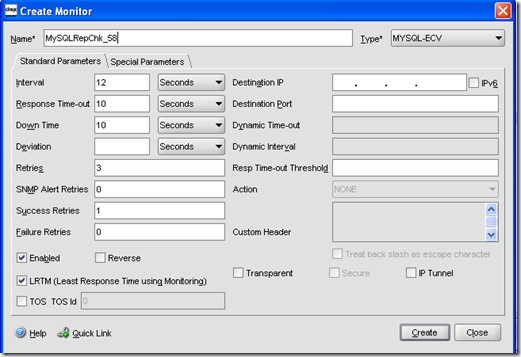
Enter the name of the monitor, select the type as MYSQL-ECV. Also enter the other parameters as per the requirement.
Now the main part of the monitor is the Special Parameter section. Go to the Special Parameters tab
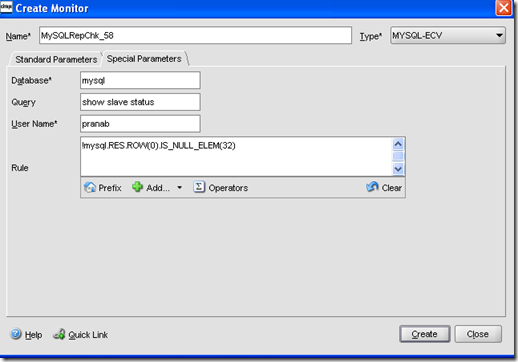
Enter the database name (actually to check slave status we do not have to select any database name, but here this field is compulsory, so I have entered mysql).
Enter the query that will be sent to the MySQL server for response. To check MySQL slave status enter show slave status
Enter the username using which this monitor will connect the database server (this user must have privileges to run the query we entered in the Query field). I have entered the username pranab that I created in the previous step.
Now we have to write the rule based on which we will decide whether the service is UP or DOWN. I wrote the rule as:
!mysql.RES.ROW(0).IS_NULL_ELEM(32)
mysql.RES –> It operates on MySQL response
ROW(0) –> First row sent by MySQL (row index starts from 0)
IS_NULL_ELEM(32) –> Checks whether the 33rd column (column index starts from 0) of the 1st row is NULL, and depending on that returns TRUE or FALSE.
The reason I selected the 1st row’s 33nd columns is, I am inspecting whether the Seconds_Behind_Master column value is NULL (if replications stops this becomes NULL otherwise it gives number of seconds).
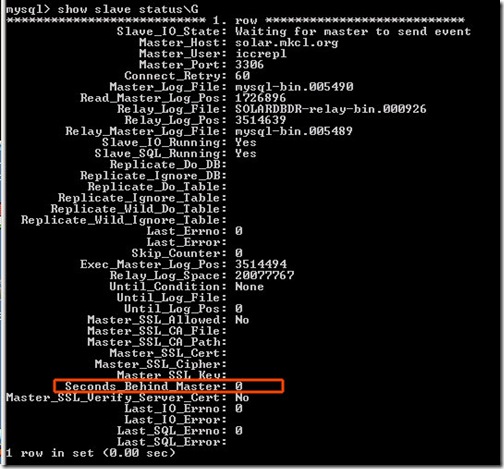
The rule I wrote will return true if Seconds_Behind_Master is not NULL hence it will mark the service status as UP. If Seconds_Behind_Master is NULL then this rule will return false and the service will be marked as DOWN.
I tried to check the value of Seconds_Behind_Master using the rules like mysql.RES.ROW(0).NUM_ELEM(32) == 0 or mysql.RES.ROW(0).NUM_ELEM(32) < 10 , but that didn’t work for me.
Create this monitor and add it to all the MySQL slave services. That’s all I have to do at the Netscaler end. Final thing I have to do it to change the connection pool settings in my Glassfish Cluster and configure the IP of the MySQL virtual server we created in the Netscaler.
Note: The MySQL monitor that we created in Netscaler will use the database user’s credential that we specified while creating the monitor. This database user has to be created in Netscaler before creating the monitor. But the client queries that Netscaler receives will be sent to the database server using the username that was sent by the client.
- Connection Multiplexing: Database requests are connection based, Netscaler takes multiple client side connections and uses connection multiplexing to enable multiple client side requests to be made over the same server side connection. That means we will have much lesser number of connections in database server side.
- Load Balancing of SQL requests: We can use many load balancing algorithms to send SQL queries to the available servers. Most commonly used algorithms are Least Connections and Least Response Time.
- Content Switching: It’s an awesome option, using it we can inspect the SQL content and depending on our specified rule, requests are distributed amongst different servers.
In this post I am going to show a simple read-only database scale out using NetScaler DataStream. I have a couple of replicated MySQL slaves and I want to load balance the select queries amongst these MySQL slaves. I will configure a JDBC connection pool in my Glassfish Cluster and that pool will connect to the NetScaler LoadBalancer instead of directly connecting to a database server. The setup is shown in the below image:

First I will configure all the MySQL slaves in Netscaler.
Add the all the MySQL slave servers. Go to Load Balancing –> Servers

Enter the name for the server and IP address for that server.

After adding all the MySQL servers, I am going to add the MySQL services running in these servers. Go to Load Balancing –> Services

Enter the name for the service, select the MySQL server we added in the previously, select Protocol MySQL and the port on which MySQL is running in this server, in my case it is the default MySQL port 3306.

Same way create services for all the MySQL servers that we want to run.
Now I will create the virtual server for these MySQL services. Go to Load Balancing –> Virtual Servers

Enter the name for this virtual server. Enter the IP Address, select the protocol MySQL and enter the port, here I have entered the default port for MySQL. Select the MySQL slave services that we want to add to this virtual server. Select the Load Balancing method as per your requirement, in the Method and Persistence tab.

So we are ready with our MySQL virtual server. Right now we can start using it, but thing is that at this point all my MySQL services are using default TCP monitors. The good thing with Netscaler is that we can create monitors for monitoring MySQL services. For DataStream, Netscaler has monitor type MYSQL-ECV. Using this type of monitor we can send SQL request and parse the response of the request and then decide the state of the service. I will create a simple MYSQL-ECV type monitor which will check the replication status in a MySQL slave server. If there is any error with the slave, it will mark the service as DOWN.
First I have to add a database user. Using this database user’s username and password my MySQL-ECV monitor will connect to the database server. Go to System –> Database Users

Enter the database username and password.

Then I will create the MySQL-ECV monitor. Go to Load Balancing –> Monitors

Enter the name of the monitor, select the type as MYSQL-ECV. Also enter the other parameters as per the requirement.

Now the main part of the monitor is the Special Parameter section. Go to the Special Parameters tab

Enter the database name (actually to check slave status we do not have to select any database name, but here this field is compulsory, so I have entered mysql).
Enter the query that will be sent to the MySQL server for response. To check MySQL slave status enter show slave status
Enter the username using which this monitor will connect the database server (this user must have privileges to run the query we entered in the Query field). I have entered the username pranab that I created in the previous step.
Now we have to write the rule based on which we will decide whether the service is UP or DOWN. I wrote the rule as:
!mysql.RES.ROW(0).IS_NULL_ELEM(32)
mysql.RES –> It operates on MySQL response
ROW(0) –> First row sent by MySQL (row index starts from 0)
IS_NULL_ELEM(32) –> Checks whether the 33rd column (column index starts from 0) of the 1st row is NULL, and depending on that returns TRUE or FALSE.
The reason I selected the 1st row’s 33nd columns is, I am inspecting whether the Seconds_Behind_Master column value is NULL (if replications stops this becomes NULL otherwise it gives number of seconds).

The rule I wrote will return true if Seconds_Behind_Master is not NULL hence it will mark the service status as UP. If Seconds_Behind_Master is NULL then this rule will return false and the service will be marked as DOWN.
I tried to check the value of Seconds_Behind_Master using the rules like mysql.RES.ROW(0).NUM_ELEM(32) == 0 or mysql.RES.ROW(0).NUM_ELEM(32) < 10 , but that didn’t work for me.
Create this monitor and add it to all the MySQL slave services. That’s all I have to do at the Netscaler end. Final thing I have to do it to change the connection pool settings in my Glassfish Cluster and configure the IP of the MySQL virtual server we created in the Netscaler.
Note: The MySQL monitor that we created in Netscaler will use the database user’s credential that we specified while creating the monitor. This database user has to be created in Netscaler before creating the monitor. But the client queries that Netscaler receives will be sent to the database server using the username that was sent by the client.


