One of the cool feature of Amazon cloud is that you can scale up and down your infrastructure as per the requirement changes, and that is also automatically based on some predefined conditions. Auto Scaling will automatically start new instances as our load grows and also terminates the instances as load comes down. All these happen depending on our configured settings. This makes auto scaling very effective and reduces administrative overhead.
In this example I will use Amazon cloud watch monitoring to monitor load on my instances and depending on CPU load, the Auto Scaling will work. To configure Auto Scaling we will need Auto Scaling Command Line Tool and Amazon CloudWatch Command Line Tool.
Setting up the pre-requisites:
We need to have Java installed to run these tools, also need to have JAVA_HOME set properly.
Extract the Auto Scaling and CloudWatch command line tools and copy it to some directory.
e.g. I copied to D:\AWS\AutoScaling-1.0.61.1 and D:\AWS\CloudWatch-1.0.13.4
Set the following environment variables (For this example I am going to use one Windows 7 system. So setting of the environment variables shown in this example are Windows specific) :
AWS_AUTO_SCALING_HOME = D:\AWS\AutoScaling-1.0.61.1

Add D:\AWS\AutoScaling-1.0.61.1\bin to you PATH variable.
AWS_CLOUDWATCH_HOME=D:\AWS\CloudWatch-1.0.13.4
Also add D:\AWS\CloudWatch-1.0.13.4\bin to your PATH variable.
We need to provide the command line tool with AWS user credentials. There are two ways of providing AWS user credentials: using AWS keys or using X.509 certificates. For this example I will use my AWS keys.
To get AWS keys login to your AWS account, go to Security Credentials –> Access Keys

Create a text file say aws-credential-file.txt. Copy the Access Key ID from your AWS account and paste to AWSAccessKeyId and copy the Secret Access Key and paste to AWSSecretKey in the file.
AWSAccessKeyId=<AWS Access Key ID>
AWSSecretKey=<AWS Secret Access Key>
Best way to inform the command line tool about this file is to create an environment variable AWS_CREDENTIAL_FILE and set the path of the file.
e.g. AWS_CREDENTIAL_FILE=D:\AWS\aws-credential-file.txt
By default, the Auto Scaling command line tool uses the Eastern United States Region (us-east-1). Suppose we need to configure our instances in a different region then we have to add another environment variable AWS_AUTO_SCALING_URL and set this variable with specific end point for that region.
If I want to set my region as Singapore, then I have to use
AWS_AUTO_SCALING_URL = https://autoscaling.ap-southeast-1.amazonaws.com
The list of Regions and Endpoints is available in this link http://docs.amazonwebservices.com/general/latest/gr/rande.html
First I will create the AMI that I will use for Auto Scaling
- Select any public AMI that suits our requirement.
- Start an instance with that AMI, we will deploy all the required applications and do all the configurations.
- Create AMI from the running instance.
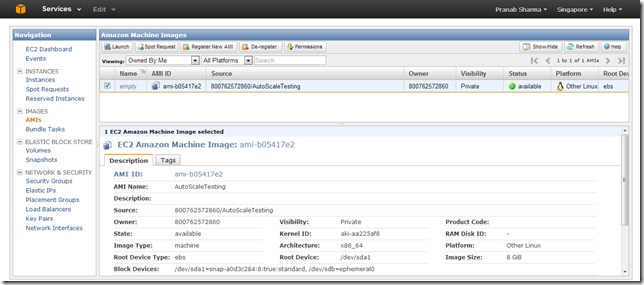
My AMI is created, note the AMI ID, this AMI ID will be used to start new instances.
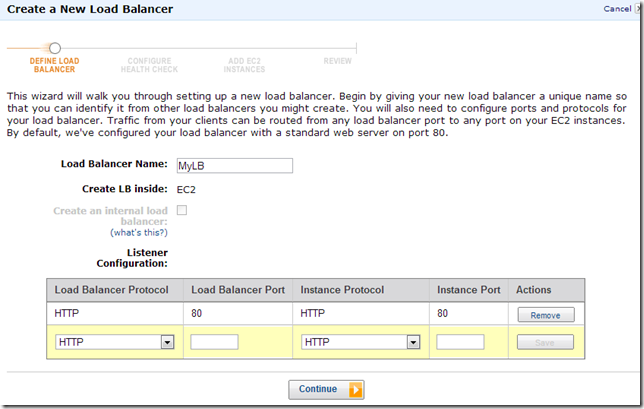
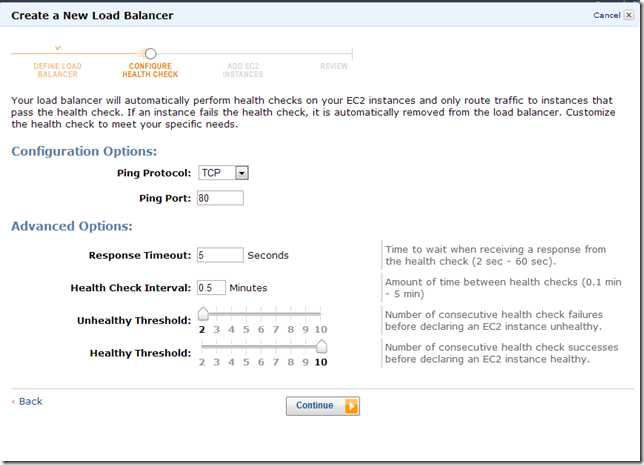
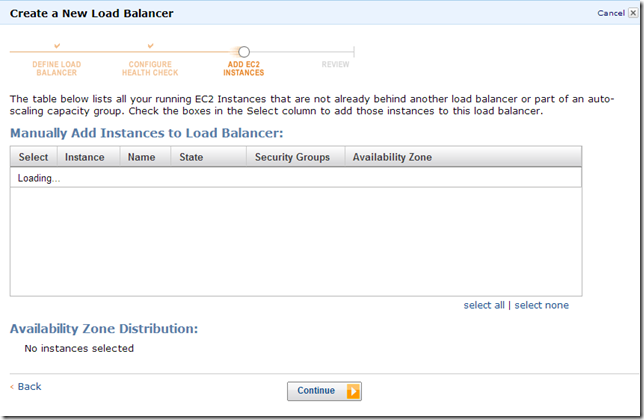
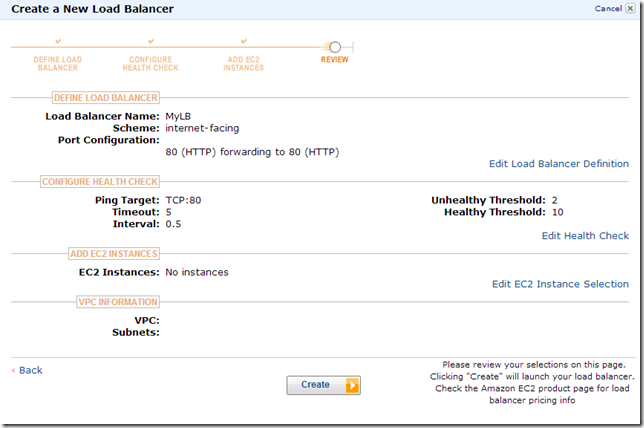
I will create one load balancer for load balancing HTTP requests into the Auto Scaling instances.

We have to create a Key Pair to use with Auto Scaling. Key Pair can be created from the AWS web console
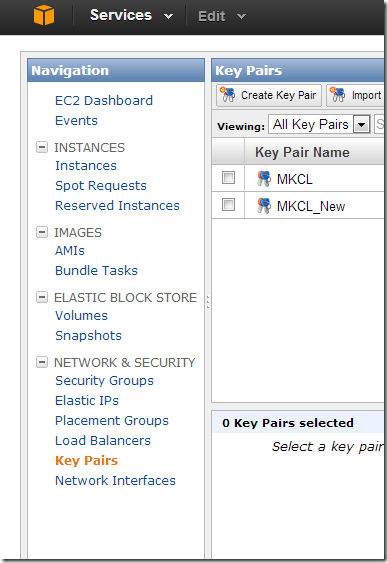
I am going to use the MKCL_New key for this example.
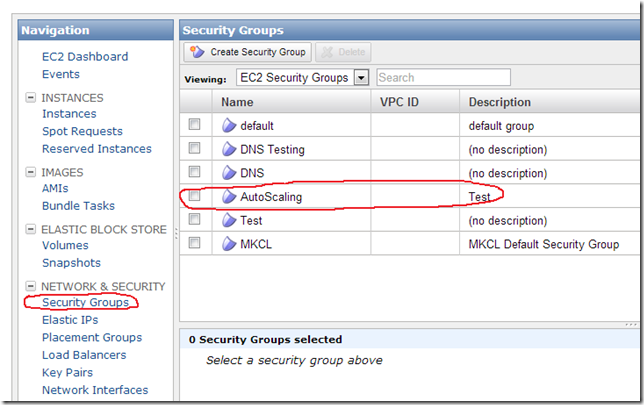
Next we need to have a security group, for this example I will use AutoScaling security group, that I created for this example.
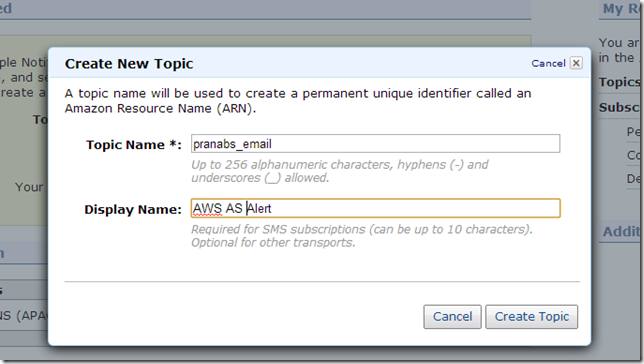
Also I will configure SNS, so that I will get email alerts for Auto Scaling.

Go to SNS Dashboard and click on Create New Topic

Create new Subscription for the Topic we created

I am going to use the Email option.
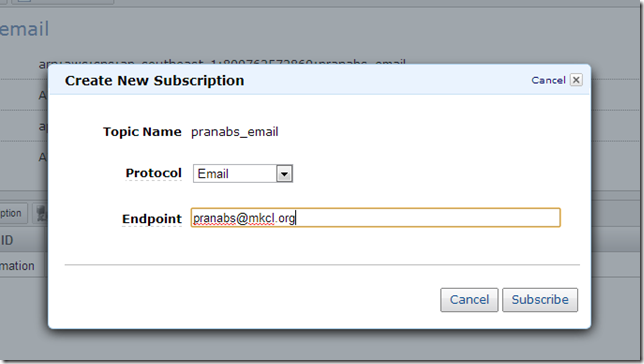
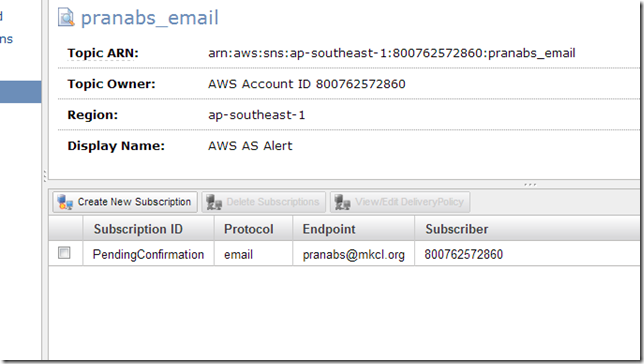
I will receive one email which will contain a link for confirming my subscription for the topic. Click on the Confirm subscription link to confirm.
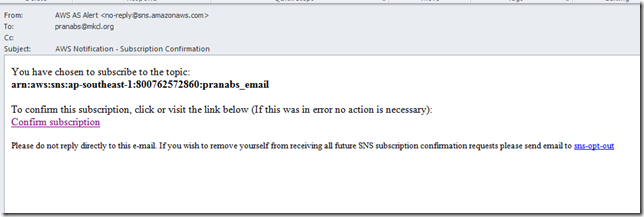
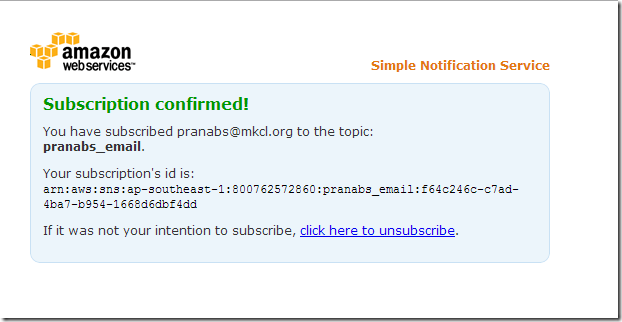
Now our prerequisites are ready and it’s the time to get our hands dirty with Auto Scaling.
Setting up Auto Scaling
Step1: Create a Launch Config
Launch config will tell what kind of instance will be launched. i.e. it specifies the template that Auto Scaling uses to launch Amazon EC2 instances.
C:\Users\pranabs>as-create-launch-config MyTestLC --image-id ami-b05417e2 --instance-type t1.micro --key MKCL_New --group AutoScaling
MyTestLC : The name of the launch config
--image-id : The AMI ID that we created for Auto Scaling
--instance-type: What type of AWS instance will be started with the AMI
--key: The keypair to be used to launch instance
--group: The name of the security group to be used
We can use as-describe-launch-configs command to see the launch configs.
C:\Users\pranabs>as-describe-launch-configs

Step2: Create an Auto Scaling Group
An Auto Scaling group is a collection of Amazon EC2 instances, here we can specify the different Auto Scaling properties like minimum number of instances, maximum number of instances, load balancer etc.
C:\Users\pranabs>as-create-auto-scaling-group MyTestASG --launch-configuration MyTestLC --availability-zones ap-southeast-1a --min-size 1 --max-size 4 --load-balancers MyLB
MyTestASG: The name of the Auto Scaling Group.
--launch-configuration: Name of the launch configuration we want to use with this Auto Scaling group.
--availability-zones: Name of the EC2 availability zone where we want to put our instances
--min-size: Minimum number of instance that should be running
--max-size: Maximum number of instances we want to create for this group
We can use as-describe-auto-scaling-groups command to see the Auto Scaling groups that I created.
C:\Users\pranabs>as-describe-auto-scaling-groups

After we run the as-create-auto-scaling-group command, one instance automatically starts. This is because we told the command that we want to maintain minimum 1 instance. So one instance is started immediately after running the command.

Step 3: Turn notification (Optional) for Auto Scaling
Now I will turn on email alert, whenever one new instance is launched and again when one instance of the Auto Scaling group is terminated.
C:\Users\pranabs>as-put-notification-configuration MyTestASG --topic-arn arn:aws:sns:ap-southeast-1:800762572860:pranabs_email --notification-types autoscaling:EC2_INSTANCE_LAUNCH, autoscaling:EC2_INSTANCE_TERMINATE

MyTestASG: The name of the Auto Scaling group for which want to enable notification
--topic-arn: Amazon Resource Name (ARN) for the email notification that we created. We can get the ARN from AWS console
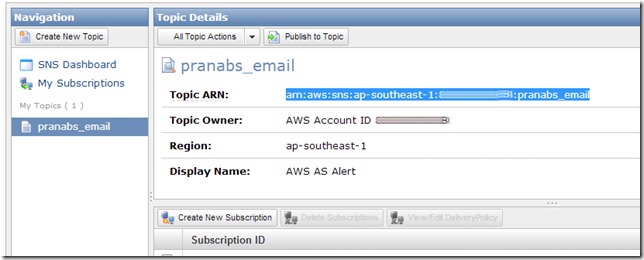
--notification-types: These are the events on which notifications are sent.
We can use as-describe-auto-scaling-notification-types command to see the available types.

I will receive one test notification email after I turn on the notification for my Auto Scaling group.

Now we will create policies to scale up and scale down number of instances for this Auto Scaling group depending on the CPU usage. If the CUP usage goes above 80%, then Auto Scaling will create a new instance.
Step 4: Create Scale Up Policy
We will use the as-put-scaling-policy command to create the scale up policy.
C:\Users\pranabs>as-put-scaling-policy MyScaleUpPolicy --auto-scaling-group MyTestASG --adjustment=1 --type ChangeInCapacity --cooldown 120
arn:aws:autoscaling:ap-southeast-1:800762572860:scalingPolicy:0c8f7361-a33f-4339-b0b3-8e94cebd3773:autoScalingGroupName/MyTestASG:policyName/MyScaleUpPolicy

MyScaleUpPolicy: The name of this scaling policy
--auto-scaling-group: Name of the Auto Scaling group in which this policy will be applicable
--adjustment: How many instances are to be created if the threshold (e.g. CPU usage above 80%) reached.
--type: It is in capacity, also we can specify PercentChangeInCapacity
--cooldown: Number of seconds between a successful scaling activity and the next scaling activity
Copy the output of the command, as we will need to use the output in the cloudwatch monitoring command.
Step 5: Create Scale Down Policy
C:\Users\pranabs>as-put-scaling-policy MyScaleDownPolicy --auto-scaling-group MyTestASG "--adjustment=-1" --type ChangeInCapacity --cooldown 120
arn:aws:autoscaling:ap-southeast-1:800762572860:scalingPolicy:ee397087-3c15-4f9c-baa2-dc1ad72ab9a0:autoScalingGroupName/MyTestASG:policyName/MyScaleDownPolicy

If you are running this command from Windows system, then enclose the --adjustment=-1 in double quotes. Otherwise you may get the following error:
C:\Users\pranabs>as-put-scaling-policy MyScaleDownPolicy --auto-scaling-group MyTestASG --adjustment=-1 --type ChangeInCapacity --cooldown 120
as-put-scaling-policy: Malformed input-MalformedInput
Usage:
as-put-scaling-policy
PolicyName --type value --auto-scaling-group value --adjustment
value [--cooldown value ] [--min-adjustment-step value ]
[General Options]
For more information and a full list of options, run "as-put-scaling-policy --help"
Now we will bind these two policies with CloudWatch monitoring
Step 6: Bind Scale Up policy with AWS CloudWatch monitoring
C:\Users\pranabs>mon-put-metric-alarm HighCPU --comparison-operator GreaterThanThreshold --evaluation-periods 1 --metric-name CPUUtilization --namespace "AWS/EC2" --period 120 --threshold 80 --alarm-actions arn:aws:autoscaling:ap-southeast-1:800762572860:scalingPolicy:0c8f7361-a33f-4339-b0b3-8e94cebd3773:autoScalingGroupName/MyTestASG:policyName/MyScaleUpPolicy --dimensions "AutoScalingGroupName=MyTestASG" --statistic Average --region ap-southeast-1
OK-Created Alarm

HighCPU: Name of the cloudwatch alarm
--comparison-operator: Specifies how to compare
--evaluation-periods: Number of consecutive periods for which the metric value has to be compared to the threshold
--metric-name: Name of the metric on which this alarm will be raised.
--namespace: Namespace of the metric on which to alarm., default is AWS/EC2
--period: Period of metric on which to alarm
--threshold: This is the threshold with which the metric value will be compared.
--alarm-actions: Use the output of the step4 Scale Up policy.
--dimensions: Dimensions of the metric on which to alarm.
--statistic: The statistic of the metric on which to alarm.Possible values are SampleCount, Average, Sum, Minimum, Maximum.
--region: Which web service region to use.
Suppose we are not using us-east-1 region, then we have to specify the –region option (or set the environment variable 'EC2_REGION'). Otherwise we will get the following error:
C:\Users\pranabs>mon-put-metric-alarm HighCPU --comparison-operator GreaterThanThreshold --evaluation-periods 1 --metric-name CPUUtilization --namespace "AWS/EC2" --period 120 --threshold 80 --alarm-actions alarm-actions arn:aws:autoscaling:ap-southeast-1:800762572860:scalingPolicy:0c8f7361-a33f-4339-b0b3-8e94cebd3773:autoScalingGroupName/MyTestASG:policyName/MyScaleUpPolicy --dimensions "AutoScalingGroupName=MyTestASG" --statistic Average
mon-put-metric-alarm: Malformed input-Invalid region ap-southeast-1 specified.
Only us-east-1 is
supported.
Usage:
mon-put-metric-alarm
AlarmName --comparison-operator value --evaluation-periods value
--metric-name value --namespace value --period value --statistic
value --threshold value [--actions-enabled value ] [--alarm-actions
value[,value...] ] [--alarm-description value ] [--dimensions
"key1=value1,key2=value2..." ] [--insufficient-data-actions
value[,value...] ] [--ok-actions value[,value...] ] [--unit value ]
[General Options]
For more information and a full list of options, run "mon-put-metric-alarm --help"
Step 7: Bind Scale Down policy with AWS CloudWatch monitoring
C:\Users\pranabs>mon-put-metric-alarm LowCPU --comparison-operator LessThanThreshold --evaluation-periods 1 --metric-name CPUUtilization --namespace "AWS/EC2" --period 120 --statistic Average --threshold 40 --alarm-actions arn:aws:autoscaling:ap-southeast-1:800762572860:scalingPolicy:ee397087-3c15-4f9c-baa2-dc1ad72ab9a0:autoScalingGroupName/MyTestASG:policyName/MyScaleDownPolicy --region ap-southeast-1 --dimensions "AutoScalingGroupName=MyTestASG"
OK-Created Alarm

To check the alarms that we created use the command mon-describe-alarms

Voila…. our Auto Scaling setup is ready. Now it is the time to test the setup.
We can check the Auto Scaling group, right now it has only one instance.

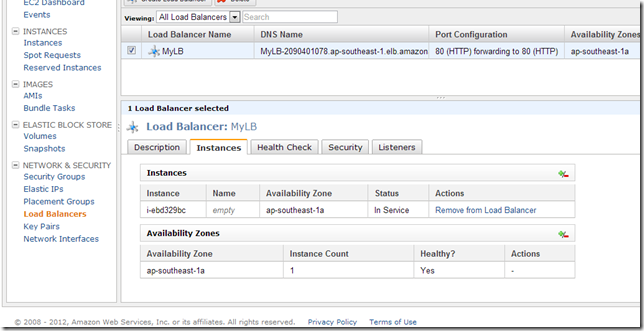
We can see that this instance is connected to our load balancer.
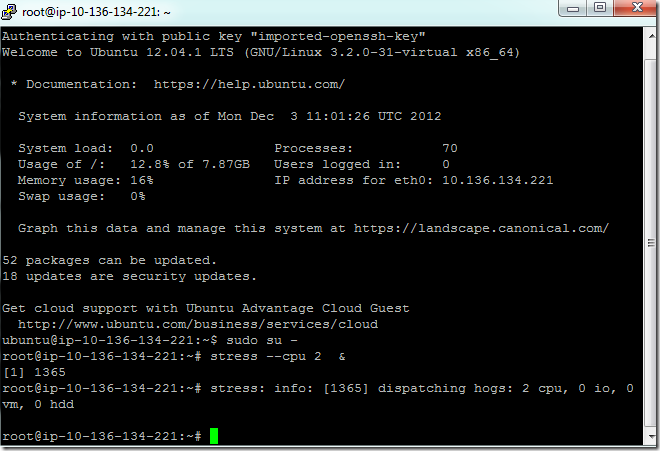
We will connect to that instance with putty and will produce some CPU load. I will use the stress utility (http://weather.ou.edu/~apw/projects/stress/) to generate CPU load.
I used apt-get command to install stress.
# apt-get install stress
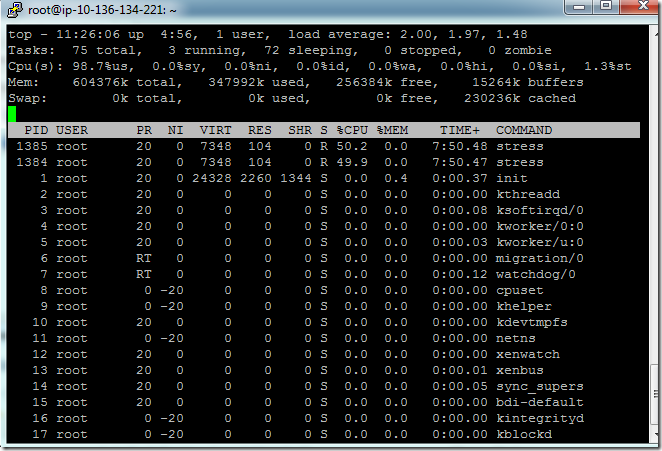
CPU usage is rocketing…
If I check the instances in my AWS console, I can see two instances now. One new instance is created by the Auto Scaling.

Checking the Auto Scaling group from command prompt, now we can see two instances in this group.

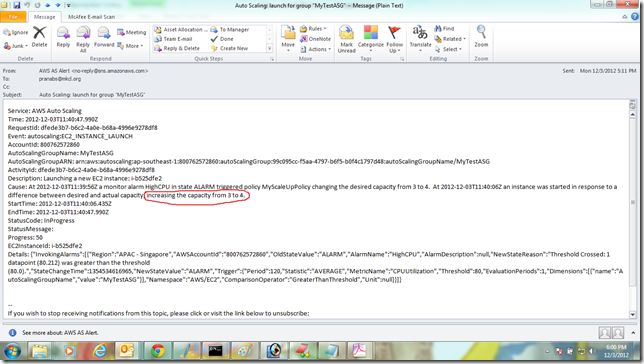
Also in my mail client, I got SNS alert mail for this instance launch.

Now again increasing CPU load on the new instance.
I am getting mail alerts for Auto Scaling.
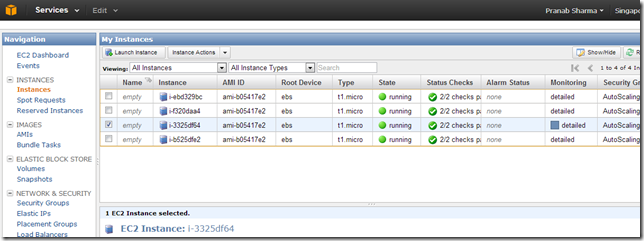
I can see total four instances are launched (which is maximum for my Auto Scaling group).

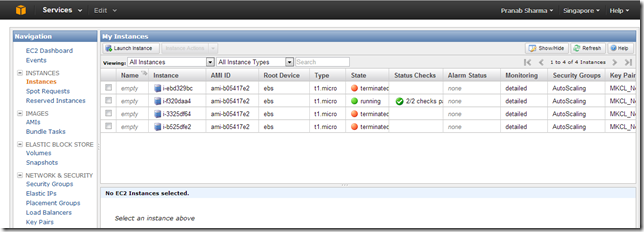
Now I will scale down, I am killing all the stress processes, so that the CPU load comes down. Now we can see the three instances are terminated as we reduced the CPU load.
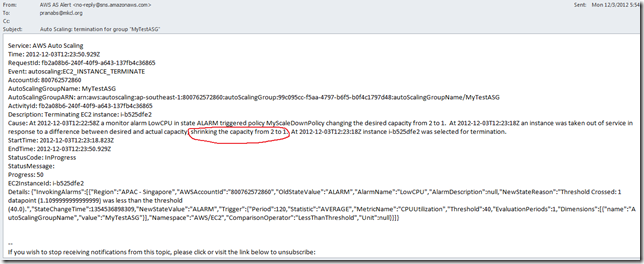
I am getting mail alerts as instances are getting terminated.
Our Auto Scaling testing is successfully over, so it is the time for cleanup.
Cleanup Process
First I will remove all the instances of this Auto Scaling group.
C:\Users\pranabs>as-update-auto-scaling-group MyTestASG --min-size 0 --max-size 0
OK-Updated AutoScalingGroup

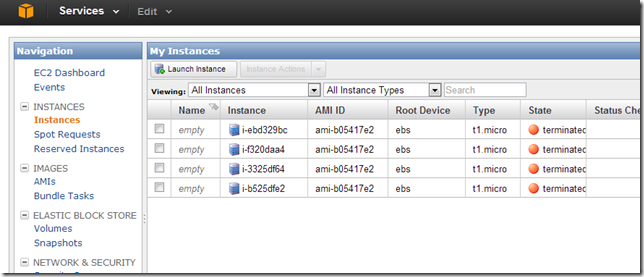
After this command we can see all the instances are terminated
Delete the Auto Scaling group
C:\Users\pranabs>as-delete-auto-scaling-group MyTestASG

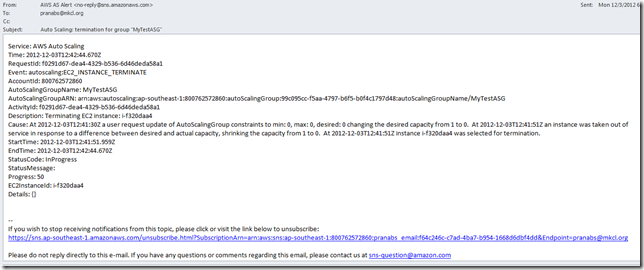
On deleting the Auto Scaling group, I will get email alert.
Delete the launch config
C:\Users\pranabs>as-delete-launch-config MyTestLC

Delete the alarms
C:\Users\pranabs>mon-delete-alarms HighCPU LowCPU

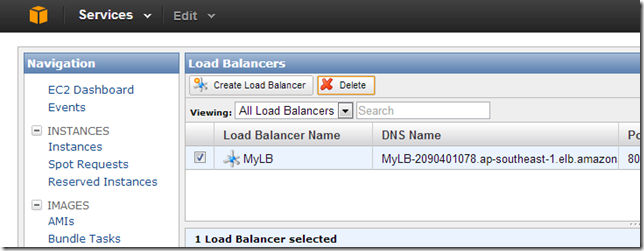
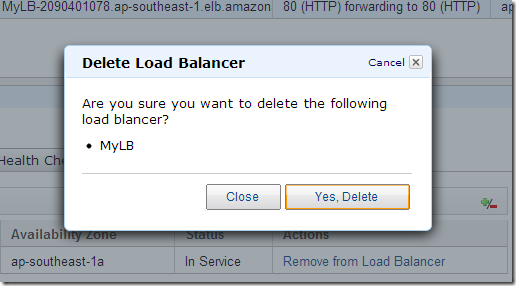
Delete the load balancer
That’s it from my side for today. Thanks for reading.
![]() .
.


