CopyDisable

Friday 30 November 2012

Using Open Source web based paper form verification software queXF

In one of my previous post Installing queXF in Ubuntu, I wrote about queXF and its installation process. In this post I will write about how to use queXF.

According to queXF documentation, forms created with queXML works with queXF. From queXF documentation: “Please note that the author has not tested a form that was not created in queXML, therefore can make no guarantees that it will work (Although it should)” .

So I decided to use queXML for creating forms. Fastest way was to use the test_questionnaire.xml file that comes with queXML as the starting point for creating my forms.

For using queXML locally, I need to have Apache FOP 0.94 (0.95 will also work, I tested with 0.95. But version 1.0 didn’t work for me), barcode4j 2.0.

Installation:

  • We need to have Java installed.
  • Download and extract Apache FOP, and add the directory to your PATH (optional),
    e.g.
    I have extracted fop-0.95-bin.zip to /usr/local/fop-0.95/ and added this directory to my PATH variable.
  • Download and extract barcode4j-2.1.0-bin.zip inside FOP directory.
    e.g.
    In my case I copied it to /usr/local/fop-0.95/barcode4j-2.1.0
  • Download Barcode4j extensions for Apache FOP barcode4j-fop-ext-complete-2.0.jar file from
    http://mirrors.ibiblio.org/pub/mirrors/maven2/net/sf/barcode4j/barcode4j-fop-ext-complete/2.0/barcode4j-fop-ext-complete-2.0.jar
    and copy it to /usr/local/fop-0.95/barcode4j-2.1.0/build folder
  • Edit the fop file (in my case it is /usr/local/fop-0.95/fop) and add the barcode4j classpath

    image
  • Download and extract queXML-1.1.0


Installation part is over, now I will edit the test_questionnaire.xml file of queXML and will create a new xml file (say test_questionnaire1.xml) and using this xml file I will generate the pdf form (say newtest.pdf ).

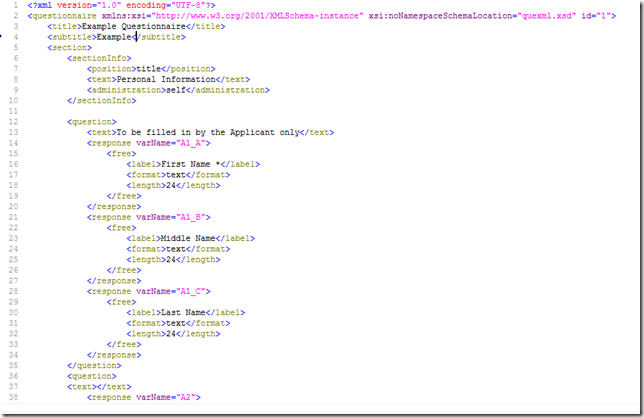
My test_questionnaire1.xml file looks like:

image

I will use fop to generate the pdf file

root@ubuntu3:~# fop -xml quexml-1.3.10/test_questionnaire1.xml -xsl quexml-1.3.10/to_form.xslt -pdf newtest.pdf -param questionnaireId 197 -param show_cover_page false

So the above command will generate our form as newtest.pdf file, and I will use this form in queXF. questionnaireId is a number that I gave to my form so that this form can be identified uniquely using Barcode.

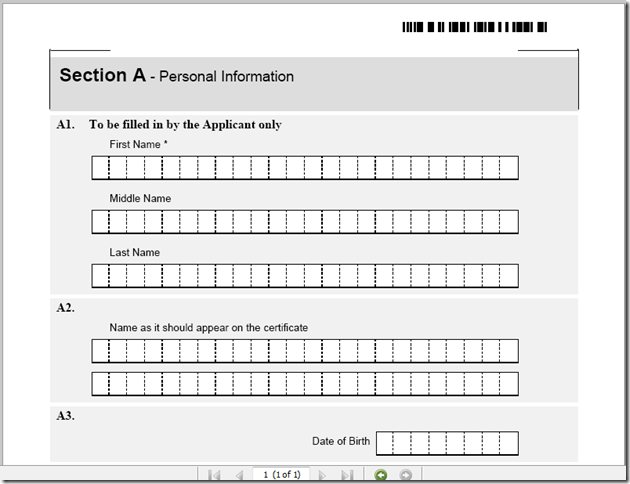
The form generated by above command looks like

image


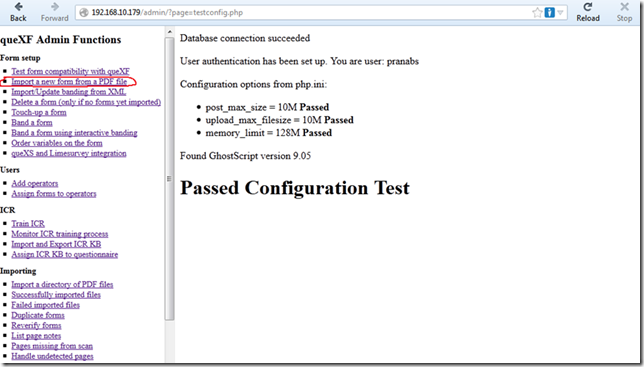
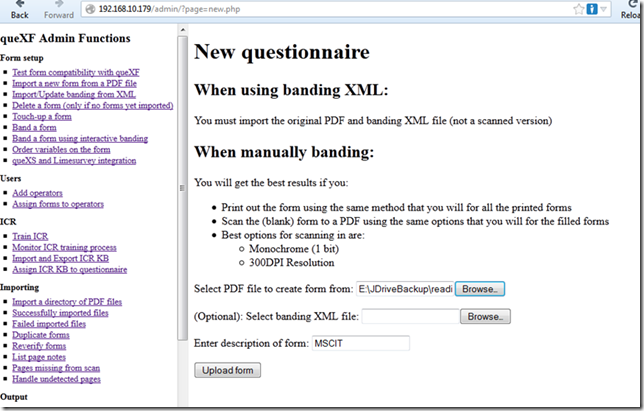
Now I will import this new form into queXF, go to you queXF site and to the admin console (e.g. http://192.168.10.179/admin), click the link Import a new form from a PDF file

image


Browse and select the pdf file (newtest.pdf) that we created. Enter some description for this form, so that later we can identify the form with this description.

image


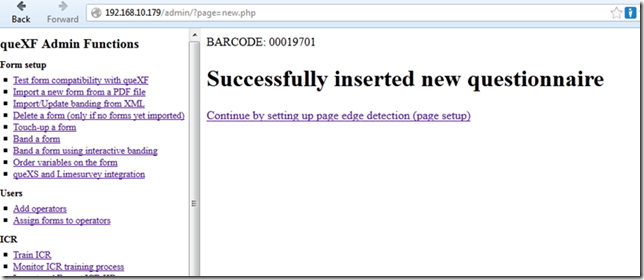
Our form has been uploaded successfully and the barcode is also detected. Now click on Continue by setting up page edge detection (page setup) link to setup the page.

image


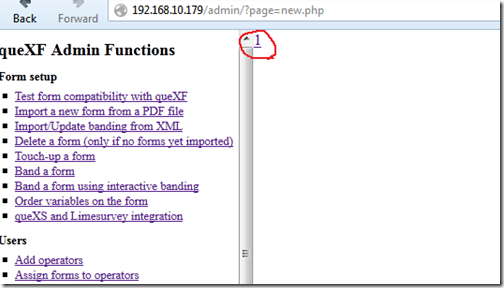
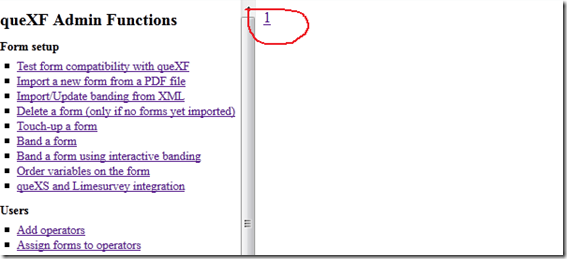
We will see links for each page of the form (with page number as 1, 2… ), as our form has only a single page so we can see only one page 1, click on the page number to go to the page.

image


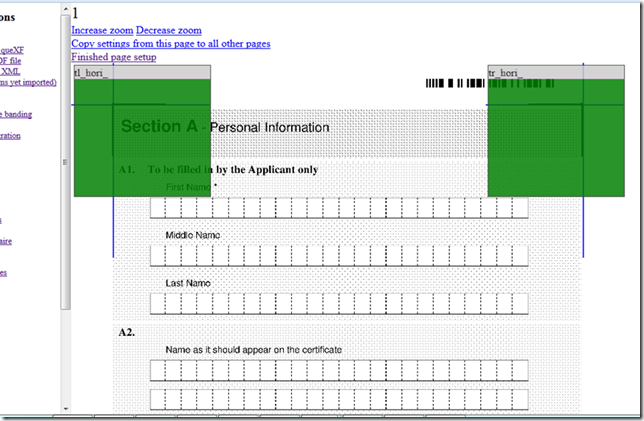
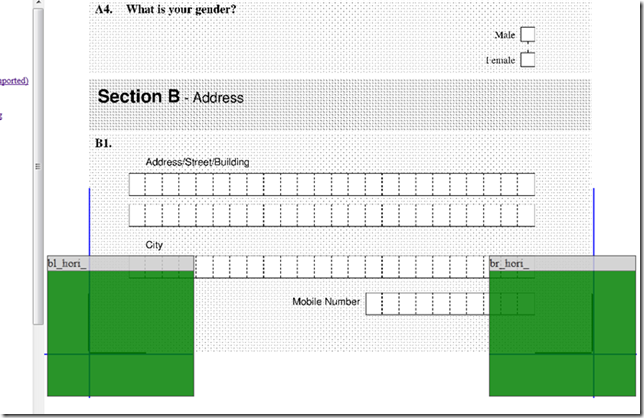
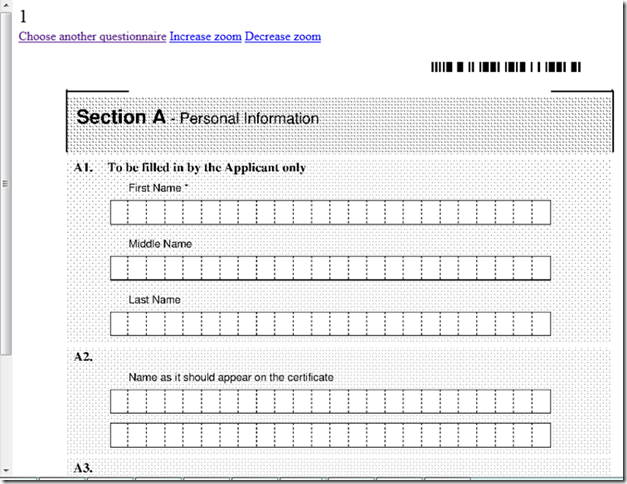
Here green square boxes are to detect the edges of the form, if they appear to be in the proper position then no need to move or resize them. Blue lines in this page should appear to overlay over the corner edges of the form and this means queXF detected the corner lines on the form. If all the edges of the form is detected correctly, then click on Finished page setup link.

image


image


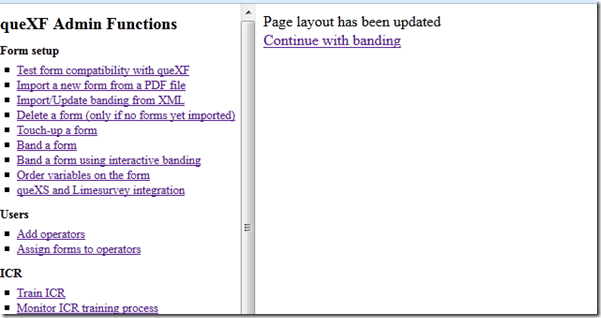
After page setup, we will band the form. Banding a form means we will mark the different fields of form that are going to be filled up.

Click on Continue with banding to go to banding process.

image


Banding a form works in two steps:

1) Identifying the fields of the form

2) Assigning field names and type of the fields to each identified field.

Click on the page number to go to that particular page of the form and band the page.

image


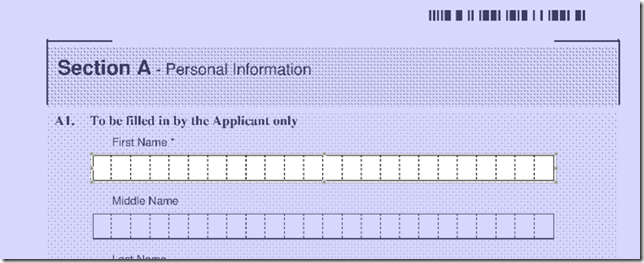
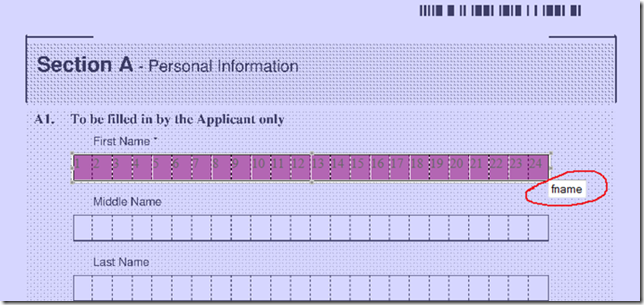
To identify a field, click on the upper left corner of the field (outside the field boxes) once and drag till it covers the whole field (i.e. till bottom right corner of the field, outside the field boxes).

image


Here we identified the First Name field of the form.

image


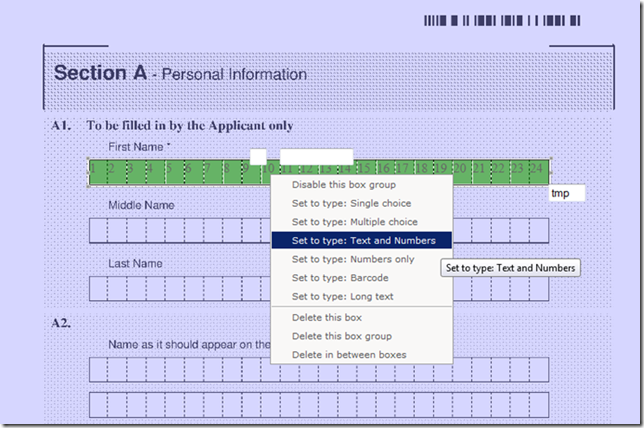
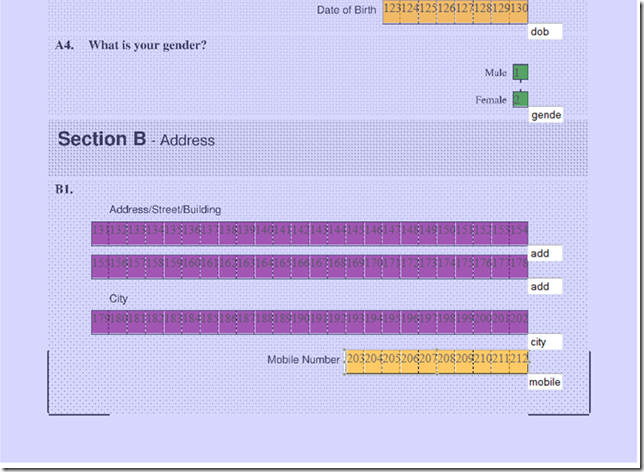
Then right click on the field and select the field’s type.

image


Enter the name for the field.

image

image


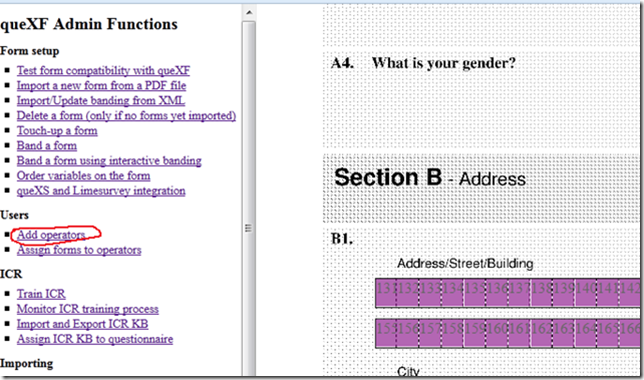
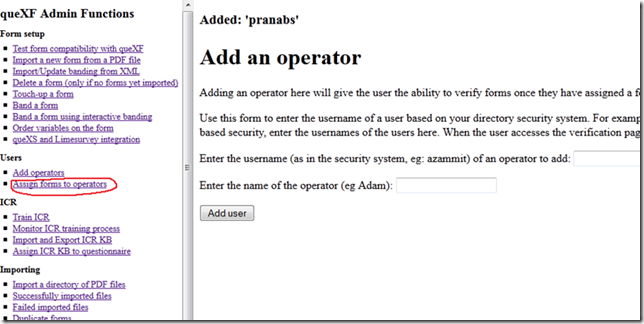
Once banding is completed for the form, we are going to add operators (operators verify the content of a filled uploaded form) for this form. Click on the Add operators link to add a new operator.

image


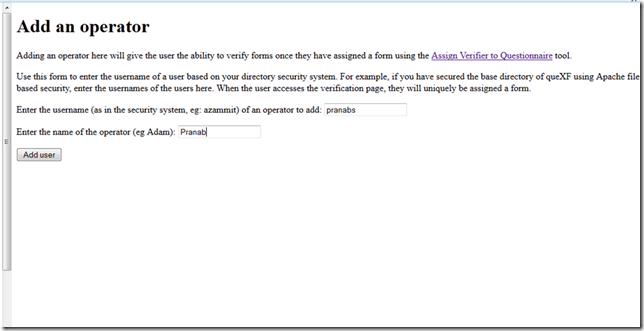
Enter the username and name for the user and click on the Add user button. But remember we have to create a user with the same name in Apache also. See my previous post Installing queXF in Ubuntu for creating user and using authentication in Apache.

image


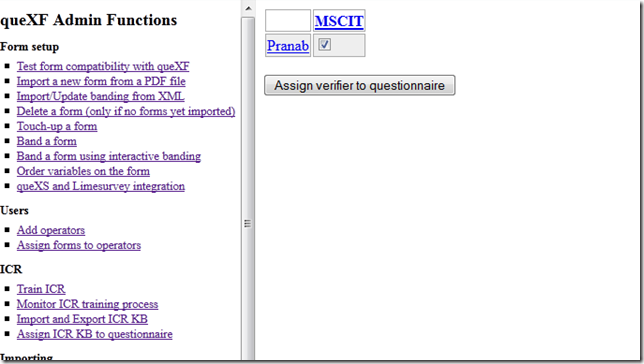
So the new operator is created and we are going to assign this operator to a particular form, so that this operator can verify the filled up forms. Click on the Assign forms to operators link

image


We imported our form as MSCIT, and the operator Pranab is going to verify the successfully imported forms of MSCIT. Enable the checkbox for the operator and click on the Assign verifier to questionnaire button.

image 


We will take printout of the pdf form (newtest.pdf file that we created) and will let our users to fill up the form. Once the forms are filled up, we will scan those forms as pdf files and going to import into queXF.

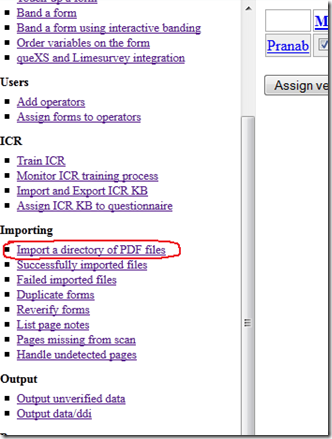
To import the filled up forms, click on the Import a directory of PDF files link


image


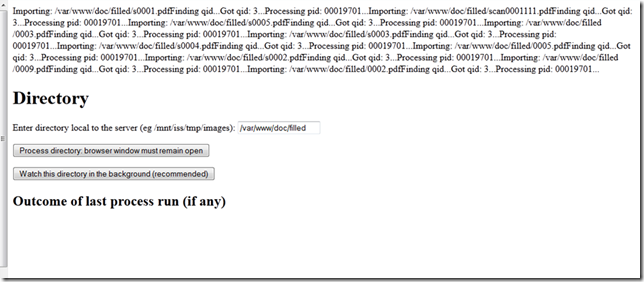
The default import directory is queXF Root/doc/filled (in my case it is /var/www/doc/filled). We can change the directory if required. We are going to upload our filled up scanned pdf files into this directory (using  FTP or SCP). We can run the import process manually by clicking the Process directory: browser window must remain open button. Also we can run the import process on background by clicking on the Watch this directory in the background (recommended) button. For this example I am going to use the first one.

image


We can see the message of importing (I have uploaded 10 forms).

Sometimes we may get the message while importing a form Finding qid...Could not get qid... , it is basically comes if queXF is unable to read the barcode of the form.

image


If some forms fail to get imported, these forms will be listed in the Failed imported files link, here we can set whether we can again import a failed form.

image


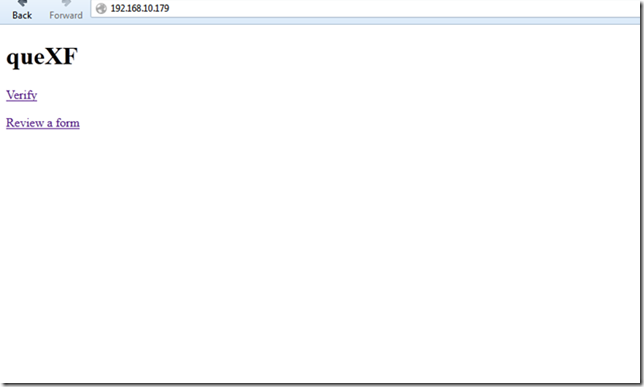
Our forms are successfully imported, now it is the turn of the operator to verify the uploaded forms. Open the queXML site and go to the Verify link

image


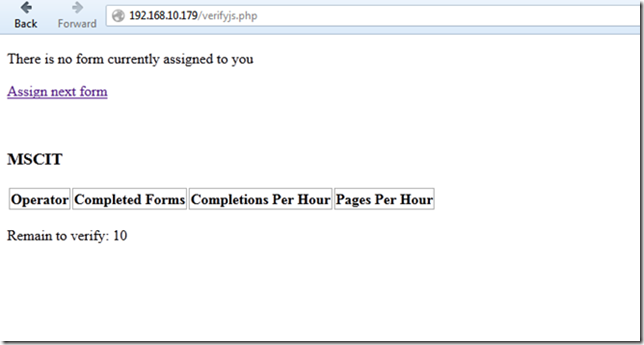
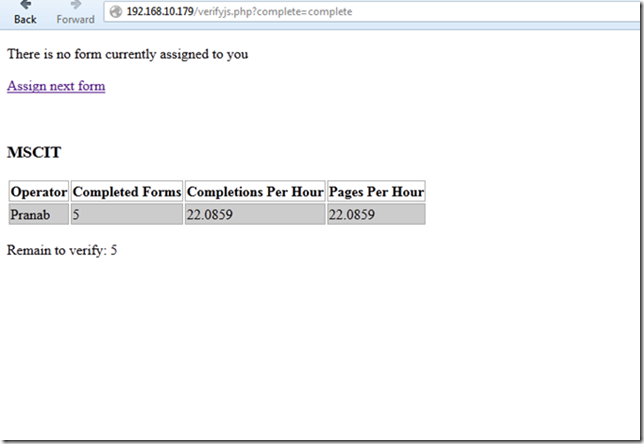
It will show us how many forms are there to verify. Right now we have 10 forms to verify. Click on the Assign next form link to assign a form for verification.

image


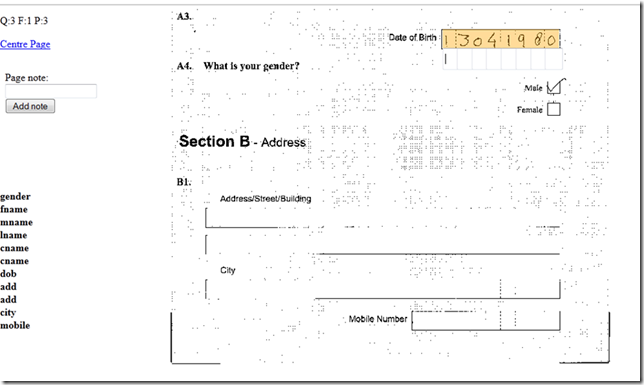
Against each field, the operator have to enter the value for each box of the field. As it is the initial stage of queXF, the ICR process is not trained. So the auto recognition of the filled up characters will not take place.

Note: The ICR process in queXF may need approximately 400 instances of each character to achieve good recognition

image


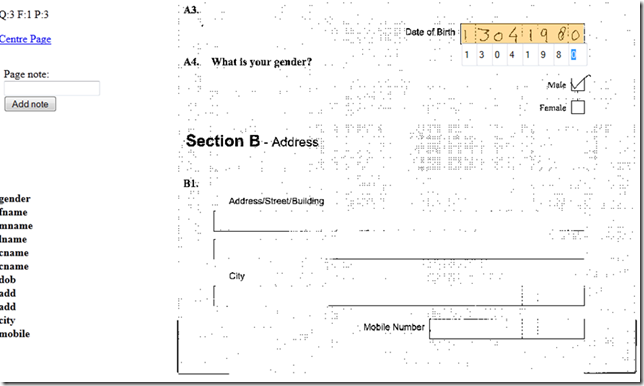
Initially feed all the fields with correct characters. ICR will depend on the correctness of the operator’s verification phase. If wrong characters are entered during this phase, then ICR training phase will also have wrong character training and as a result we will have wrong character recognition by the ICR process. So carefully verify all the fields of the form. For navigating inside a form follow the queXF Administration Manual

image


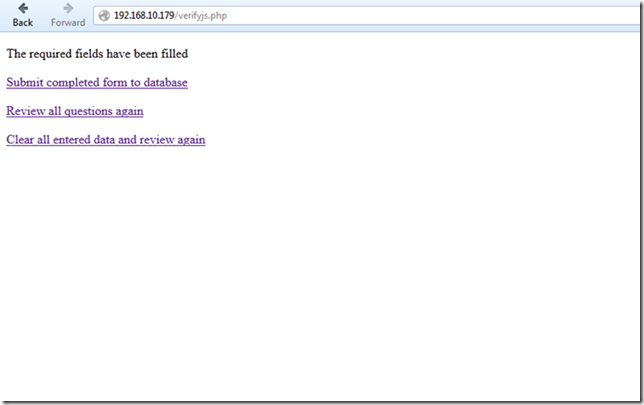
Once we verify and fill up all the fields of the form, we will be in the following page. Here you can submit the completed form to database, review all the fields of the form or clear all previous entries of the form and start verification again. We will complete the verification process for this form, so click on Submit completed form to database link.

image


We can go to the next form by clicking Assign next form link.

image


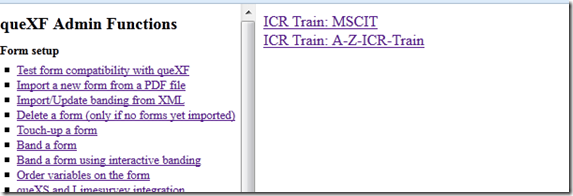
Once forms are verified, we are going to train the ICR process. Go to the link Train ICR.

image


In the Train ICR link, we will see the available forms in the system. Click on the form name to start ICR training from inputs of this form.

image

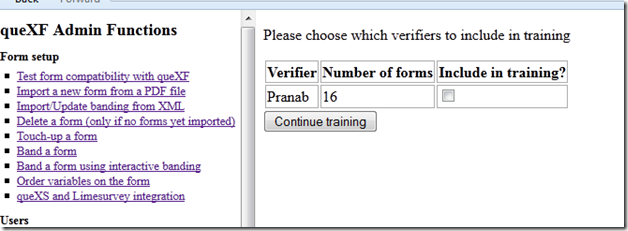
Now I have to choose which verifier’s inputs are to be included in this training. Select the verifier(s) and click on Continue training button.

image


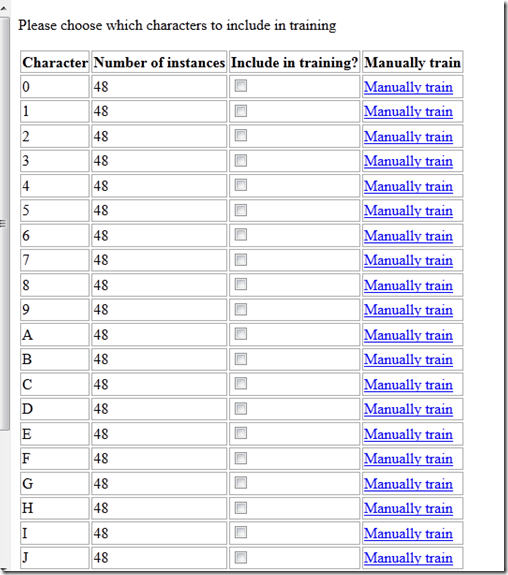
In ICR training, we have to choose the characters to be included in the training. In the table we can see the characters and number of instances of each character. We can select the characters by clicking the Include in training checkbox for each character and start the training  by clicking Start training process in background button. This will run the ICR training process in background and without any input from us. But if we want to verify that each instances of a character is correctly entered and detected by ICR training process, then we have to manually train the process. Click on the Manually train link for a character to start the manual training process for that character.

image


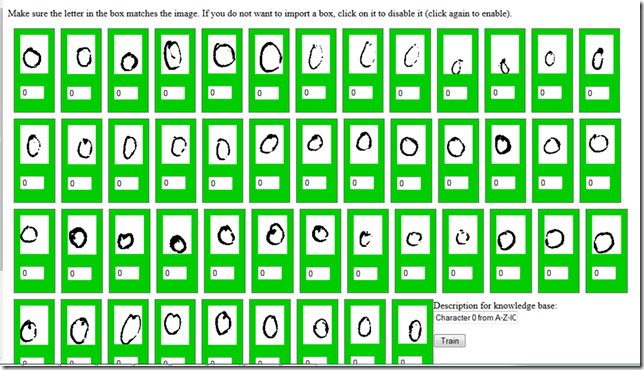
e.g. for 0 character, we can check whether all the characters are correctly entered and detected. If everything is fine, click on the Train button start the training process.

image


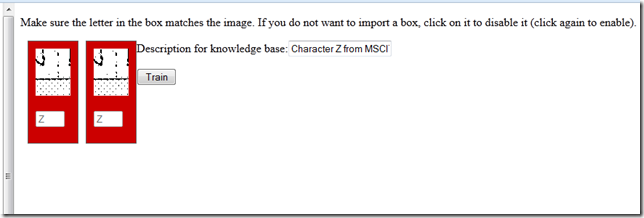
If some instances of a character is wrongly detected, we can remove those instances from training by clicking on wrongly detected instances of the character. On clicking the character instance will turn into red color from green color, indicating this character will not be added to training process. Also we can correct the character instance, if the character instance is wrongly detected. For correcting just enter the correct character at the small text field below the character instance.

image


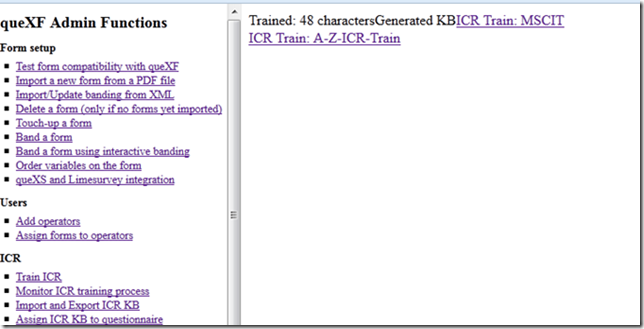
After training process for a character is completed, we can see how many characters were added to the ICR KB.

image


Once the ICR process is sufficiently trained, we can see auto detection of characters in our filled up forms when we open a form for verification.


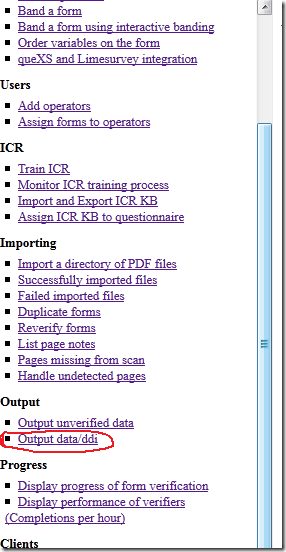
Also we can download the form data from the Output unverified data and Output data/ddi link.

The Output unverified data link contains data from the forms, which are successfully imported to the system. This data is automatically detected by system and it is not verified by the operator.

The Output data/ddi link contains data which is already verified by the operator.


image


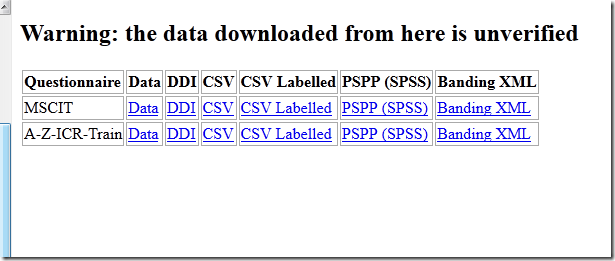
We can download the data in various formats.

image


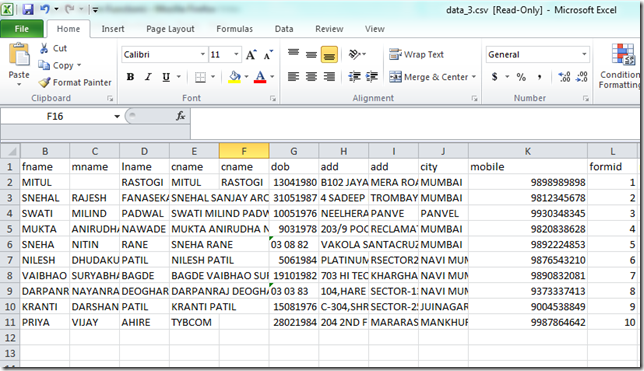
Sample data downloaded for our form in CSV format.
image

Friday 23 November 2012

Issue in installing Scrumbler plugin in redmine 1.3.1

I need to deploy the Scrumbler plugin in our redmine server (on redmine 1.3.1).

For installing, go to redmine home directory and run the git command

# cd /usr/backup/redmine-1.3.1

# git clone git://github.com/256MbTeam/Redmine-Scrumbler.git vendor/plugins/redmine_scrumbler
Run migrations
# rake db:migrate:plugin NAME=redmine_scrumbler 

I did the steps as per plugin documentation but it was not successful, I got the following problem:


rake aborted!
development database is not configured


Solution for this problem is, I have to run migrate like this:


# rake db:migrate:plugin NAME=redmine_scrumbler RAILS_ENV=production


Check your redmine-home/config/database.yml file


production:
  adapter: mysql
  database: redmine_default
  host: localhost
  port:
  username: redmine
  password: redmine
  encoding: utf8


Here we have production database configured, so the additional parameter is to be passed.


But this time I got the error


rake aborted! undefined method `application' for Rails:Module


Solution for this issue is to run the following git command in the redmine_scrumbler plugin directory. i.e. in my case /usr/backup/redmine-1.3.1/vendor/plugins/redmine_scrumbler


# git reset --hard a588932639c69ba7736a8b46ff4c683186dab94d


I got this tip from this issue link https://github.com/256MbTeam/Redmine-Scrumbler/issues/79


Now run migrations


# rake db:migrate:plugin NAME=redmine_scrumbler RAILS_ENV=production


and restart redmine. This should install the Scrumbler plugin.

Monday 19 November 2012

Installing queXF in Ubuntu

queFX is a web based Intelligent Character Recognition(ICR) software. queFX can be used as a Computer Assisted Data Entry(CADE) tool. It is written in PHP and uses MySQL as backend. In this document I am going to install queXF in an Ubuntu 12.04 box. We will need Apache, PHP, MySQL, ADOdb and Ghostscript.
Install Apache

# apt-get install apache2

Install MySQL

# apt-get install mysql-server

Install PHP5 and required extensions

# apt-get install php5 php5-gd php5-mysql

Install Ghostscript

# apt-get install ghostscript

Download and extract ADOdb from http://sourceforge.net/projects/adodb/files/adodb-php5-only/adodb-518-for-php5/

# unzip adodb518a.zip

Copy the extracted directory into some location

# cp -r adodb5 /usr/local/


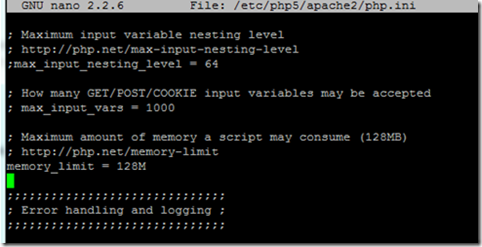
Change post_max_size to 10MB, upload_max_filesize to 10MB and memory_limit to 128MB in PHP configuration file

# pico /etc/php5/apache2/php.ini

image

image

image


Download queXF from http://sourceforge.net/projects/quexf/files/quexf/quexf-1.13.5/

Extract the zip file

# unzip quexf-1.13.5.zip

Copy the extracted files into Apache’s document root directory

# cd quexf-1.13.5/

# cp -rf * /var/www/

Change the owner of the files from current user

# chown -R www-data:www-data *


We need to enable user authentication in Apache.
Create a password file for Apache and store this file is in some safe location (somewhere not accessible from the web).

# mkdir -p  /usr/local/apache/passwd

# htpasswd -c /usr/local/apache/passwd/passwords pranabs

image

Add more user using the same command but without –c option, otherwise it will overwrite the file and previously created users:

# htpasswd /usr/local/apache/passwd/passwords ajitj


My apache config file for default site looks like

# cat /etc/apache2/sites-available/default


<VirtualHost *:80>
        ServerAdmin webmaster@localhost

        DocumentRoot /var/www
        <Directory />
                Options FollowSymLinks
        </Directory>
        <Directory /var/www/>
                Options Indexes FollowSymLinks MultiViews
                AllowOverride All
                Order allow,deny
                Allow from all
        </Directory>

        ScriptAlias /cgi-bin/ /usr/lib/cgi-bin/
        <Directory "/usr/lib/cgi-bin">
                AllowOverride None
                Options +ExecCGI -MultiViews +SymLinksIfOwnerMatch
                Order allow,deny
                Allow from all
        </Directory>

        ErrorLog ${APACHE_LOG_DIR}/error.log

        # Possible values include: debug, info, notice, warn, error, crit,
        # alert, emerg.
        LogLevel warn

        CustomLog ${APACHE_LOG_DIR}/access.log combined

    Alias /doc/ "/usr/share/doc/"
    <Directory "/usr/share/doc/">
        Options Indexes MultiViews FollowSymLinks
        AllowOverride None
        Order deny,allow
        Deny from all
        Allow from 127.0.0.0/255.0.0.0 ::1/128
    </Directory>

</VirtualHost>


Create .htaccess file in the queFX root directory

#pico /var/www/.htaccess

and add the following content:

AuthType Basic
AuthName "Restricted Files"
AuthUserFile /usr/local/apache/passwd/passwords
Require valid-user


Restart Apache

# service apache2 restart


Create MySQL database and user

mysql> create database quexf;
Query OK, 1 row affected (0.00 sec)

mysql> grant all privileges on quexf.* to 'quexf'@'localhost' identified by 'quexf';
Query OK, 0 rows affected (0.00 sec)

mysql> flush privileges;
Query OK, 0 rows affected (0.00 sec)


Import the quexf database script provided inside the database folder inside quexf application directory.

# mysql -u quexf -pquexf quexf < /var/www/database/quexf.sql


Change the queXF configuration file, set the database connection details and path for ADOdb and Ghostscript

# pico /var/www/config.inc.php

image


To test the configuration, open the link (http://servername/admin/?page=testconfig.php)

Example:

http://192.168.10.179/admin/?page=testconfig.php

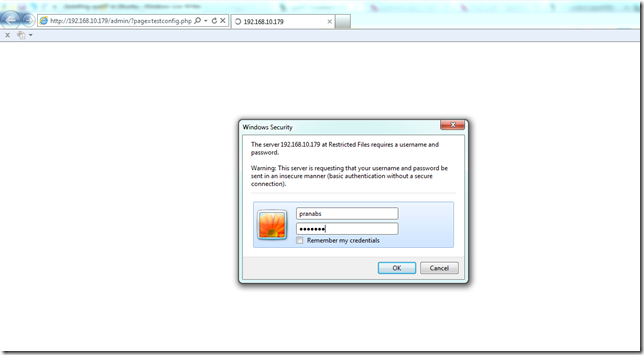
You will be asked for username and password.

image


Enter user login that we created with htpasswd command. If configuration is fine, we will see the Passed Configuration Test message:


image


That’s it, our queXF installation is ready Smile .

Monday 5 November 2012

Deploying artifacts into Artifactory repository

Continuing with my previous posts on Artifactory, in this post I will write about deploying my own jar files into the Artifactory repository. So that other projects which depends on my jar files will not have to look into any other place, they just can connect to the Artifactory repository and get the latest copy of my jar files.

I will write two ways, one using the Artifactory web GUI and second one from the command prompt.

Deploying from Artifactory Web GUI:

Deploying artifacts from Artifactory Web GUI is very simple and do not require any configuration change. So compile and package your project, get the jar file and just upload the file, that’s it.

In this example I will deploy a snapshot project in the repository. Browse and upload the jar file.

image


Artifactory will automatically generate the pom file after the jar file is uploaded.

image


Now as I am uploading a snapshot project, so I will select the default local snapshot repository (these default repositories come with Artifactory, we can create our own as per our requirement)

image

If required we can change the pom file generated by Artifactory by using the POM Editor. If everything is ok, click on Deploy Artifact button to deploy the Artifact in the repository.

image

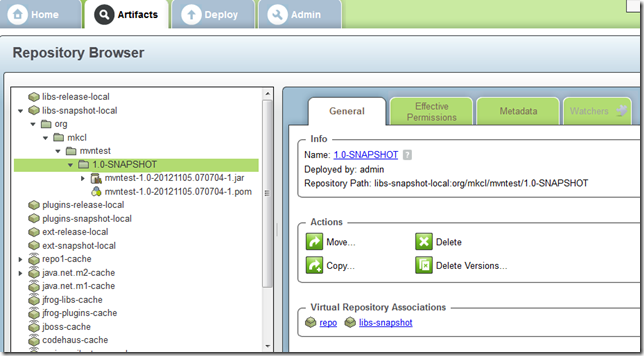
Now we can see the artifact in the repository.

image


Deploying artifacts from command line:

Here we have to do some configurations.

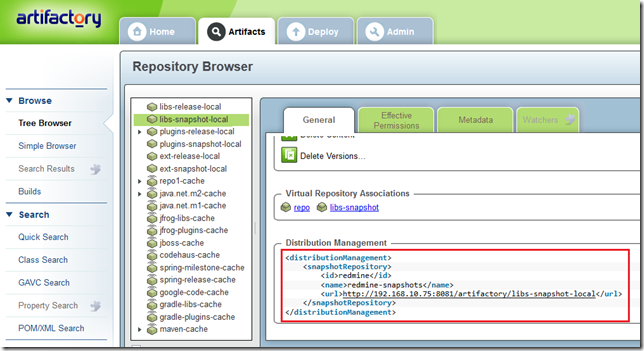
First of all we have to find the  repository element where we are going to deploy the artifact. For that just go to Artifacts->Tree Browser and click on the repository name, (for this example we are going to deploy the artifact in the libs-snapshot-local repository) in the Distribution Management section we will get the required information. Copy the <distributionManagement> element.

image


Open the pom.xml file for the project, and paste the <distributionManagement> element that we copied. Edit the <id> of <distributionManagement> and set it same as the <server> element we configured in our settings.xml file (please see my previous post Configuring Artifactory to use authentication for more information).

image

image


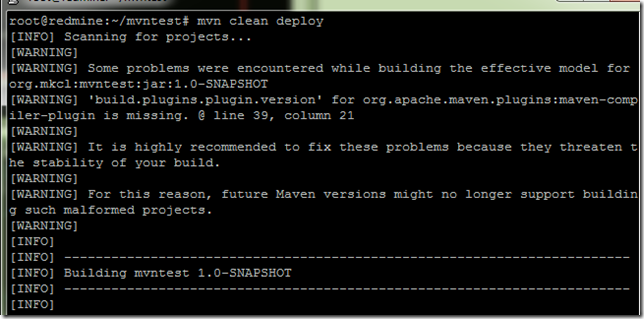
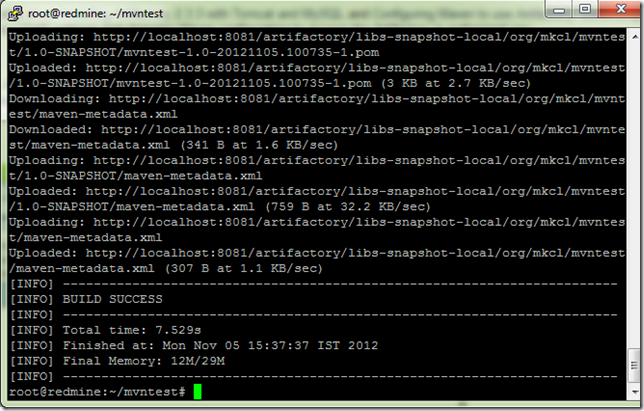
Now deploy the project.

image


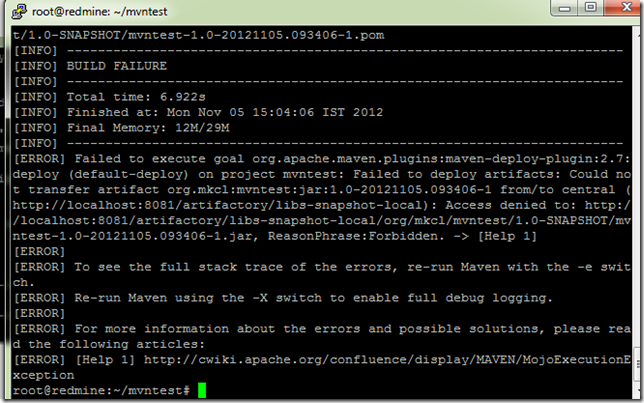
Oh no…. some error…. Access denied….hmmmm some permission related issue.

image


To deploy some artifact in the repository, the user we configured in the <server> section must have deploy privilege. In my previous post I showed how to connect using LDAP authentication. By default an user has only read privilege. So we must assign deploy privilege to the user.

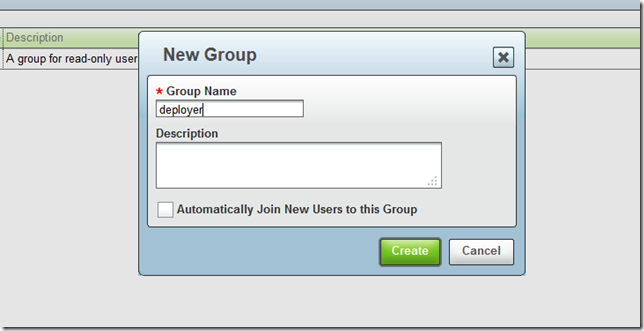
One way is to create a group and assign deploy privilege to the group and make all the users (who will deploy into the repository) member of that group. Go to Admin –> Security –> Groups and click on New button.


image


Enter the name of the group and click on Create button.

image


Go to Admin –> Security –> Permissions and click on New button.

image


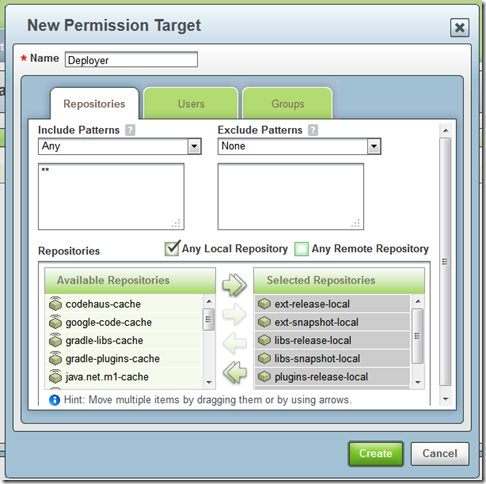
Enter the name of this permission settings, as I am going to deploy only in local repositories configured here, so I have selected only the Any Local Repository.

image


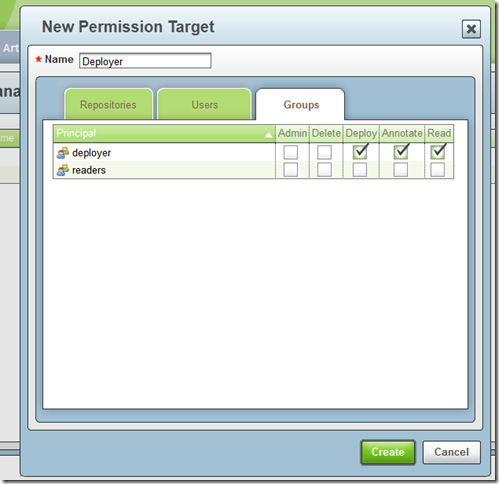
Go to Groups tab and select the Deploy privilege for the deployer group and click on Create button.

image


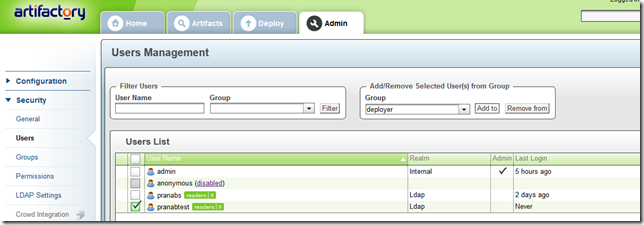
Go to Admin –> Security –> Users and select the user we want to add to the deployer group. From the Add/Remove Selected User(s) from Group list, select deployer group and click on Add to button

image

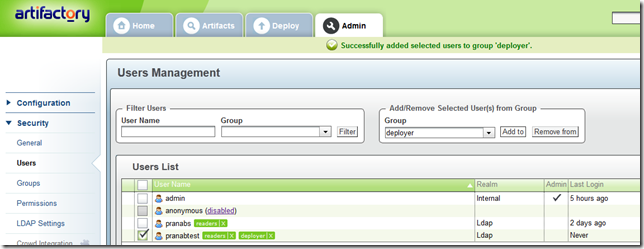
User successfully added to deployer group, now we can proceed to deploy the project again.

image


Deploying again, and this time deployment is successful Smile.

image

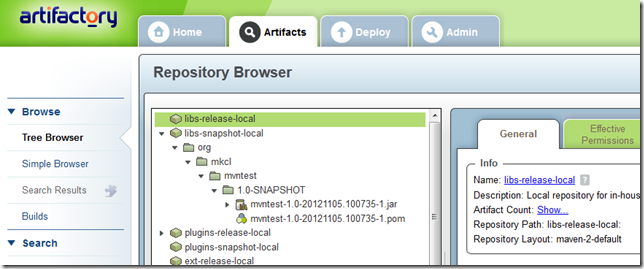
We can see the deployed project in the repository.

image


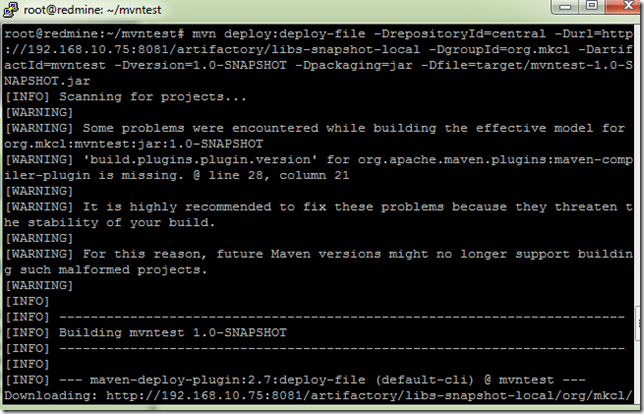
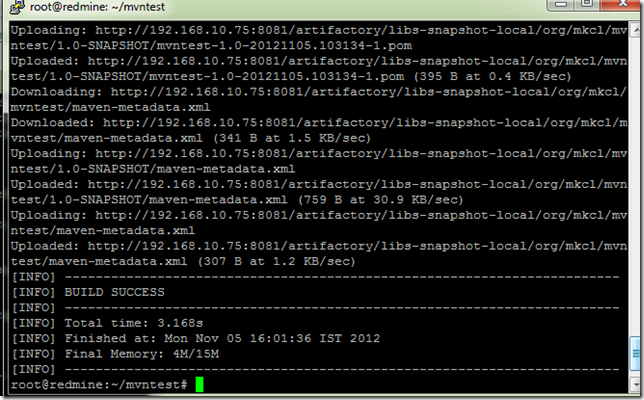
Instead of editing pom.xml file and adding the <distributionManagement> element, we can deploy the project into the repository directly from the command line.

mvn deploy:deploy-file -DrepositoryId=central -Durl=http://192.168.10.75:8081/artifactory/libs-snapshot-local -DgroupId=org.mkcl -DartifactId=mvntest -Dversion=1.0-SNAPSHOT -Dpackaging=jar -Dfile=target/mvntest-1.0-SNAPSHOT.jar

image

image