Importing an existing MySQL table into MongoDB collection is a very trivial task. I will first export the MySQL table into comma separated values (csv) file and then import the csv file into a MongoDB collection.
Step 1: Exporting MySQL table into csv file:
This can be done in many ways. I will show you simple one using the SQLYog Community edition (from http://www.webyog.com/). Connect the MySQL server using SQLYog and select the table to export. Right click on it and go to Backup/Export –> Export Table Data as CVS, SQL, Excel etc….

Select CSV format, and the Fields of the table to export. Enter the output file name and click on Export button

Once the table is exported successfully, we will see the success message.
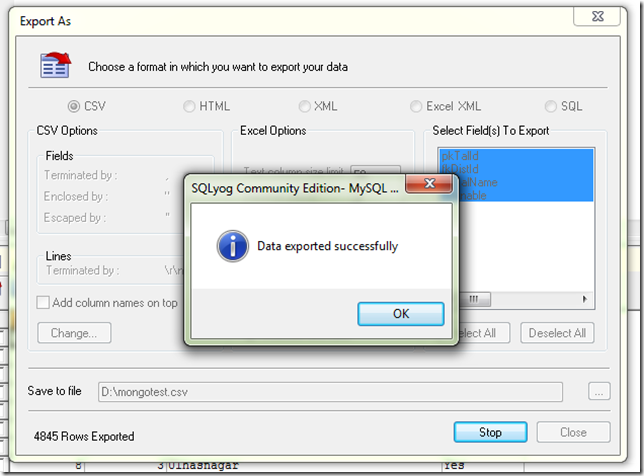
We can see 4845 rows are exported to the csv file.
Now copy the csv file (in my case mongotest.csv) into the mongodb server.
Step 2: Importing the csv file into MongoDB:
Run the mongoimport tool to import the csv file.
root@redmine:~# mongoimport --db test --collection talukamaster --type csv -fields TalukaID,DistrictID,TalukaName,Enabled --file mongotest.csv
--db or –d : MongoDB database to use
--collection or –c : Collection to use
--type: Type of file to import
--fields or –f : Comma separated list of field names
--file: File to import from

From the output, we can see that 4845 objects are imported by the mongoimport tool, which is same as the number of rows exported. That means all the MySQL table rows are imported successfully.
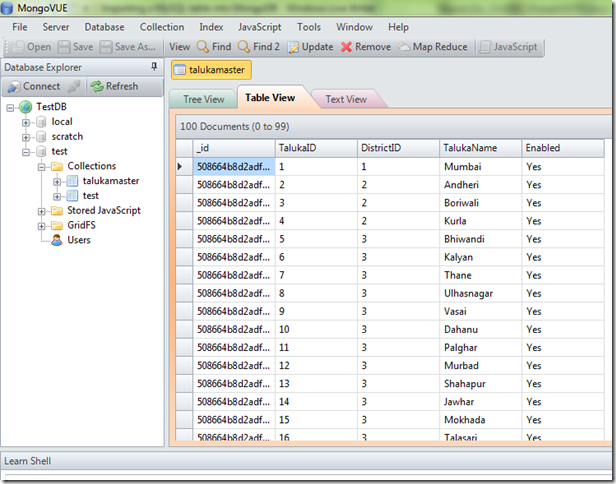
I will use one MongoDB GUI MongoVUE (http://blog.mongovue.com/) to view the just imported collection in MongoDB.
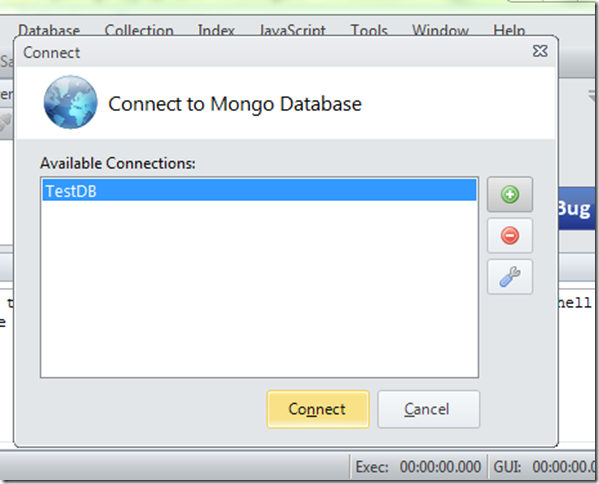
Connect to MongoDB server, if you do not have any saved connections, click on the add new connection button (green + button)
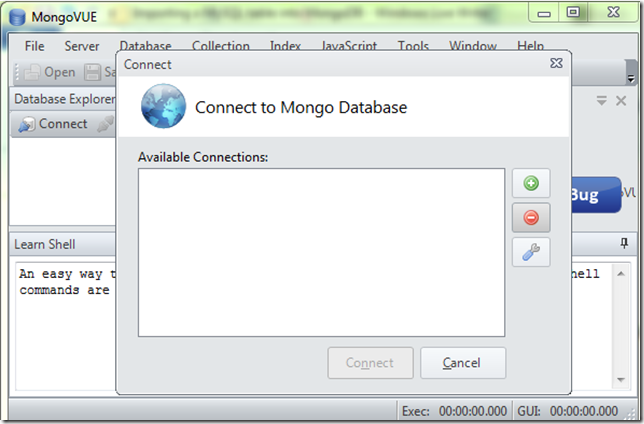
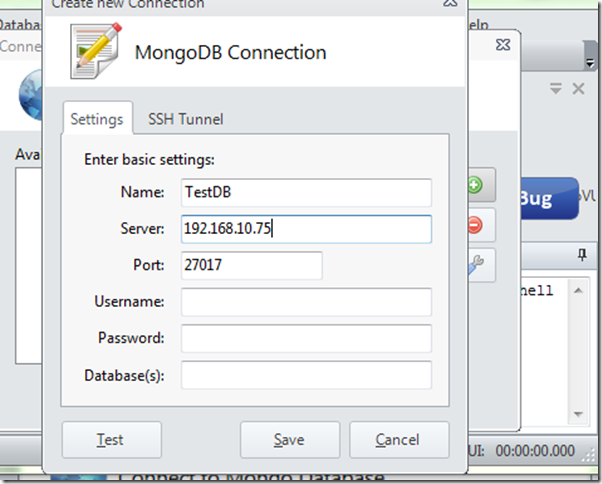
Enter the connection details, to check the connection settings, click on Test button.
If settings and OK and DB connection is successful, we can see the success message.
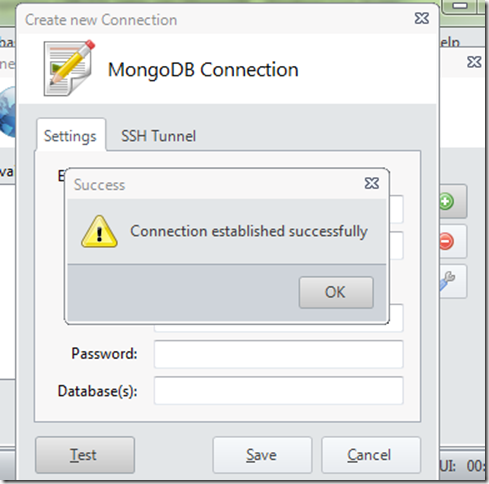
Now connect to the MongoDB server using the new connection that we just created.
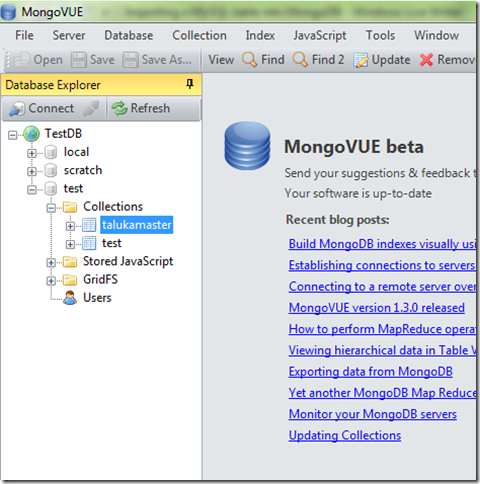
Navigate to the collection that we imported using the mongoimport tool.
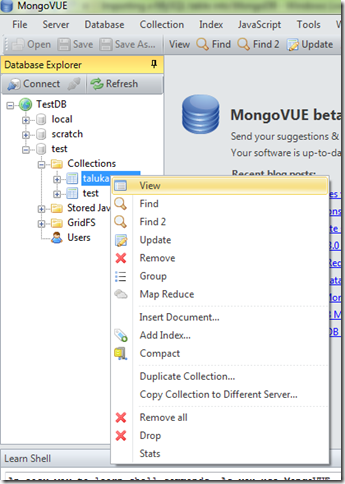
Right click on the collection name and click on View to view the documents stored in this collection.
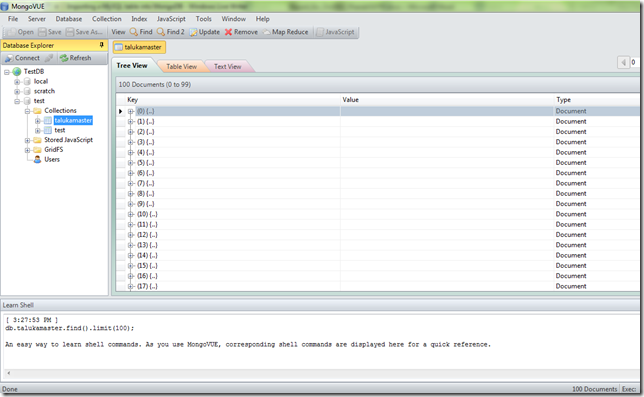
As we are used to with viewing data in tabular format, so click on Table View tab. We can have our familiar RDBMS table like view of the collection….


Step 1: Exporting MySQL table into csv file:
This can be done in many ways. I will show you simple one using the SQLYog Community edition (from http://www.webyog.com/). Connect the MySQL server using SQLYog and select the table to export. Right click on it and go to Backup/Export –> Export Table Data as CVS, SQL, Excel etc….

Select CSV format, and the Fields of the table to export. Enter the output file name and click on Export button

Once the table is exported successfully, we will see the success message.

We can see 4845 rows are exported to the csv file.
Now copy the csv file (in my case mongotest.csv) into the mongodb server.
Step 2: Importing the csv file into MongoDB:
Run the mongoimport tool to import the csv file.
root@redmine:~# mongoimport --db test --collection talukamaster --type csv -fields TalukaID,DistrictID,TalukaName,Enabled --file mongotest.csv
--db or –d : MongoDB database to use
--collection or –c : Collection to use
--type: Type of file to import
--fields or –f : Comma separated list of field names
--file: File to import from

From the output, we can see that 4845 objects are imported by the mongoimport tool, which is same as the number of rows exported. That means all the MySQL table rows are imported successfully.
I will use one MongoDB GUI MongoVUE (http://blog.mongovue.com/) to view the just imported collection in MongoDB.
Connect to MongoDB server, if you do not have any saved connections, click on the add new connection button (green + button)

Enter the connection details, to check the connection settings, click on Test button.

If settings and OK and DB connection is successful, we can see the success message.

Now connect to the MongoDB server using the new connection that we just created.

Navigate to the collection that we imported using the mongoimport tool.

Right click on the collection name and click on View to view the documents stored in this collection.


As we are used to with viewing data in tabular format, so click on Table View tab. We can have our familiar RDBMS table like view of the collection….

